Introduction
One will discover how to transform a simple countertop into a professional‑grade kombucha kegging station. This guide explains each phase of the build, from selecting fermentation vessels to configuring pressure control. By following the instructions, a beginner can serve carbonated kombucha on demand at parties, cafés, or home gatherings. The result is a reliable system that preserves flavor, reduces waste, and impresses guests.
What You’ll Need
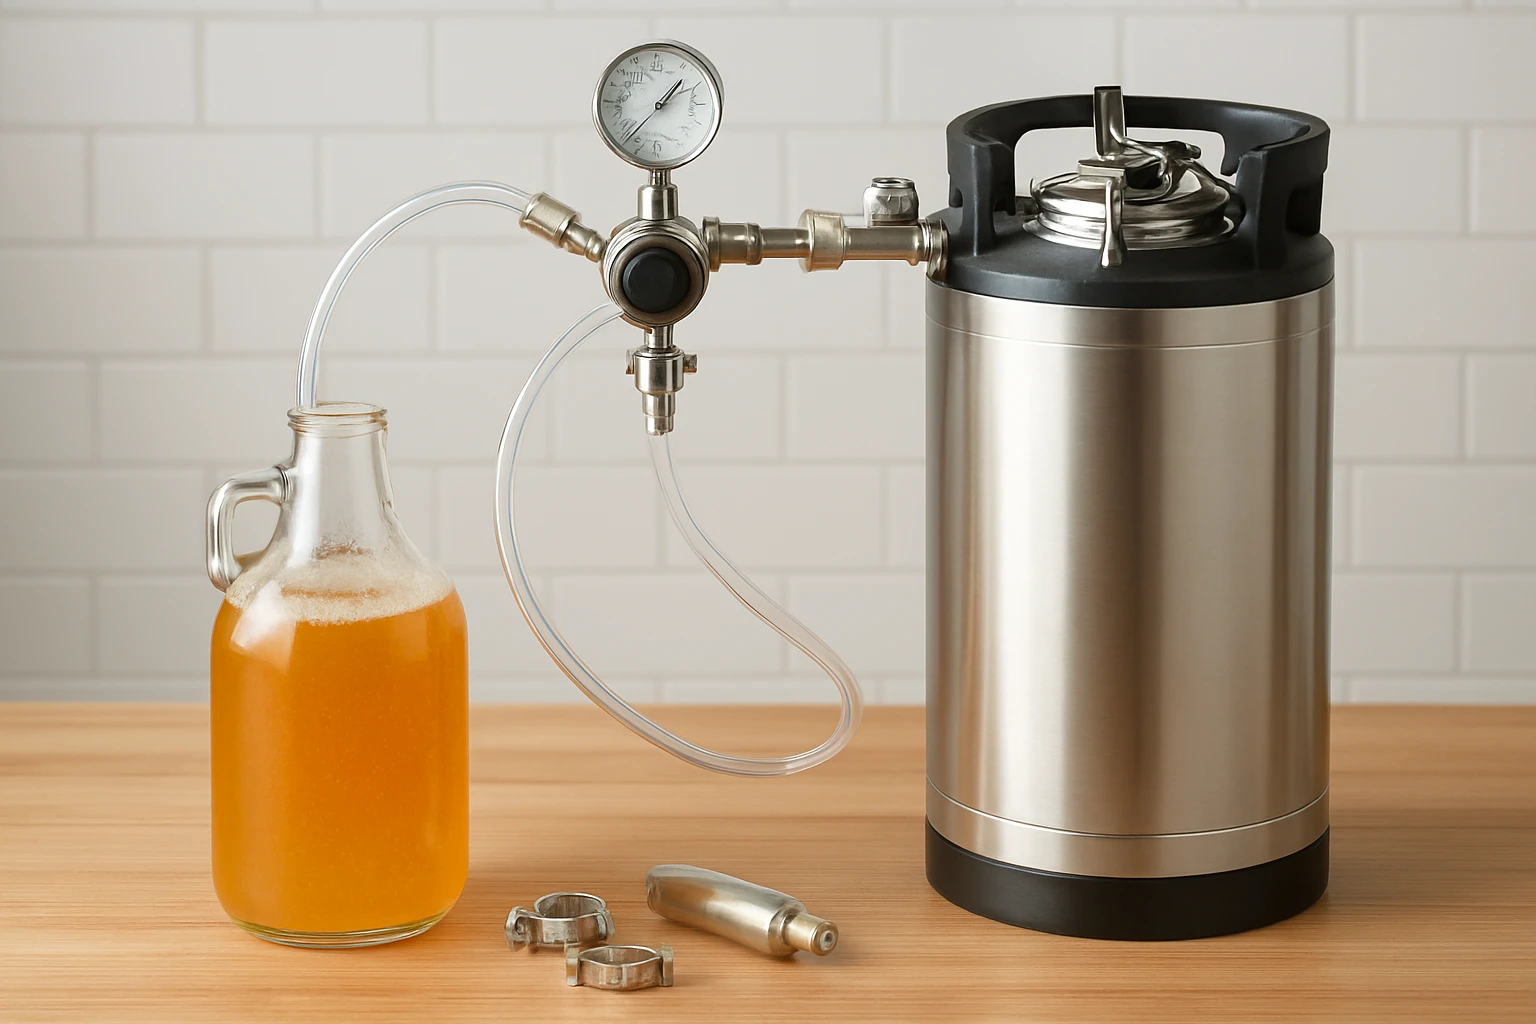
- 1 × Adfaga Mini Keg – stainless‑steel 2 L keg with pressure gauge
- 1 × Craft A Brew Kombucha Jar – 1‑gallon fermentation jar with valve
- Food‑grade CO₂ canister (5 lb) and regulator
- Silicone tubing (¼‑inch inner diameter)
- Cleaning brush, sanitizer, and measuring cup
- Optional: temperature strip, drip tray, and decorative countertop mat
Step 1: Prepare the Fermentation Jar
The first task is to ready the Craft A Brew Kombucha Jar for a primary brew. Rinse the jar with warm water, then sanitize using a food‑grade sanitizer according to the manufacturer’s instructions. The jar’s hexagonal shape encourages the SCOBY to grow uniformly, while the built‑in dispensing valve simplifies transfer to the keg later. Mark the 1‑gallon fill line with a permanent marker to avoid over‑filling, which could cause excessive pressure during carbonation.
Step 2: Brew Your First Batch of Kombucha
Prepare sweet tea by dissolving one cup of sugar in eight cups of water, then steep six teaspoons of black tea for ten minutes. Cool the tea to room temperature, add the SCOBY and starter tea, and pour the mixture into the jar up to the 1‑gallon line. Seal the jar with its custom cloth cover to allow airflow while preventing contaminants. Ferment for seven to ten days in a dark, temperature‑stable area (ideally 75 °F). During this period, the SCOBY consumes sugars and produces natural carbonation.
Step 3: Transfer Fermented Kombucha to the Mini Keg
After the primary fermentation, gently open the jar’s valve and position the food‑grade hose between the jar and the Adfaga Mini Keg. The keg’s 60 PSI gauge provides precise pressure monitoring, allowing one to maintain carbonation without over‑pressurizing. Slowly pour the kombucha into the keg, leaving about 1‑inch headspace to accommodate gas expansion. The knurled wine divider technology creates laminar flow, reducing foam and preserving delicate flavors.
Step 4: Carbonate the Kombucha in the Keg
Connect the CO₂ regulator to the keg’s inlet valve and set the pressure to 10–12 PSI for a gentle carbonation level. Monitor the gauge; the Level 2 60 PSI gauge on the Adfaga Mini Keg offers accurate readings, ensuring consistent results. Allow the kombucha to carbonate for 12–24 hours, checking the taste after the first 12 hours. If the desired fizz is not reached, increase the pressure by one PSI increments, but never exceed 15 PSI to avoid excessive foaming.
Step 5: Serve Directly from the Keg
When the carbonation is satisfactory, adjust the adjustable outlet valve to a slow drip setting. The ergonomic design of the valve prevents drips and enables clean pours onto glasses or into bottles. Serve the kombucha directly from the countertop, using the built‑in handle on the Adfaga Mini Keg to move the unit if needed. The stainless‑steel construction maintains the beverage at an optimal temperature for up to several hours, enhancing the drinking experience.
Tips & Pro Tips
- Maintain a consistent fermentation temperature; fluctuations can lead to off‑flavors.
- Use a dedicated sanitizer for all equipment to prevent contamination.
- When scaling up, duplicate the kegging system for each flavor to avoid cross‑contamination.
- For a clearer final product, filter the kombucha through a coffee filter before kegging.
- Store the keg in a shaded area; direct sunlight can degrade the beverage.
Troubleshooting
Problem: Excessive foam during pour.
Solution: Reduce the outlet valve opening, lower the CO₂ pressure by 1–2 PSI, and allow the keg to sit for five minutes before serving.
Problem: Flat kombucha after carbonation.
Solution: Verify that the CO₂ regulator is not leaking, ensure the hose connections are tight, and increase pressure gradually while monitoring the gauge.
Problem: Unpleasant sour taste.
Solution: Check the fermentation time; over‑fermentation can produce excessive acidity. Shorten the primary fermentation period by one to two days for the next batch.
Conclusion
One now possesses a functional countertop kombucha kegging system that blends home‑brew authenticity with bar‑level convenience. By employing the Craft A Brew Kombucha Jar for fermentation and the Adfaga Mini Keg for carbonation and serving, the process becomes streamlined and repeatable. Continued experimentation with flavors, carbonation levels, and serving styles will further refine the system. Enjoy the satisfaction of serving fresh, effervescent kombucha directly from a professional‑grade keg.
Products Mentioned in This Guide
Frequently Asked Questions
What equipment do I need to build a countertop kombucha kegging system?
You need a stainless‑steel mini keg, a 1‑gallon kombucha fermentation jar with valve, a food‑grade CO₂ canister and regulator, ¼‑inch silicone tubing, cleaning brushes, sanitizer, and optional items like a temperature strip or drip tray.
How do I prepare the fermentation jar before connecting it to the keg?
Thoroughly clean and sanitize the jar, attach its valve securely, and ensure the lid seals tightly to keep the brew airtight.
How is pressure controlled in the countertop kombucha system?
Connect the CO₂ canister to a regulator, set the desired PSI, and monitor the pressure gauge on the mini keg to maintain consistent carbonation.
Can I serve carbonated kombucha directly from the countertop keg?
Yes, once the kombucha reaches the target carbonation, you can dispense it straight from the keg through a tap or valve, preferably keeping the keg chilled for best taste.
What is the best way to clean and maintain the kegging system?
Disassemble the keg and tubing after each use, scrub with a brush, sanitize, rinse well, and regularly inspect seals and O‑rings for wear.