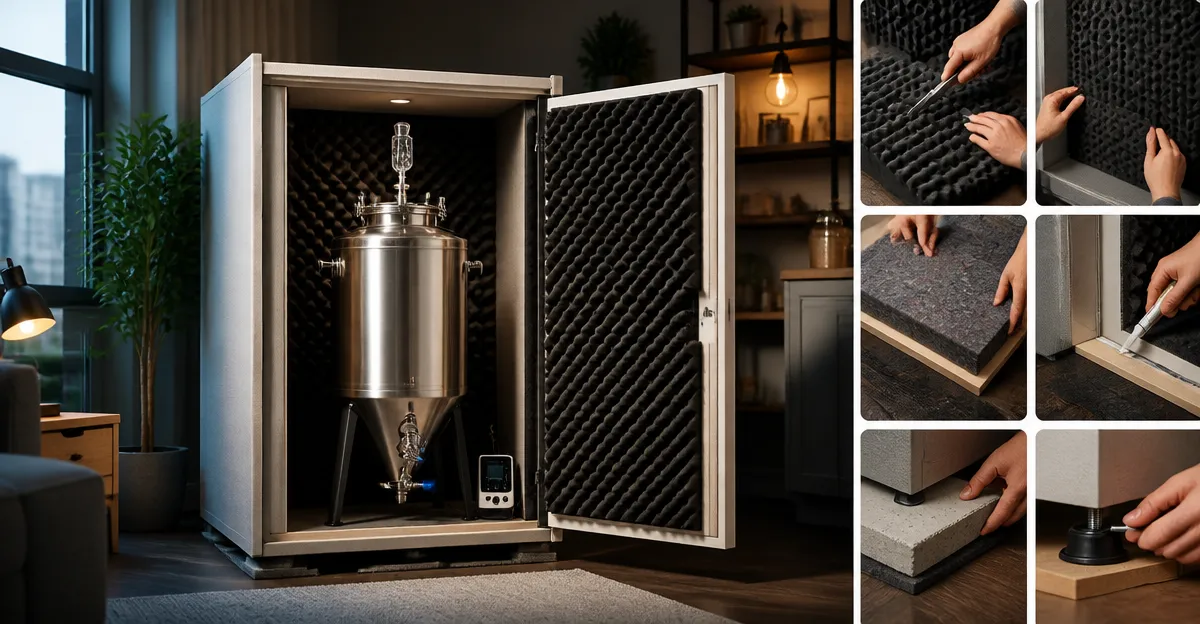
How to Reduce Fermentation Equipment Noise in Your Apartment: Easy Soundproofing Tips for Homebrewers
Introduction
Homebrewing can be a rewarding hobby, yet the constant hum of fermenters, pumps, and cooling units often disturbs roommates or neighbors. This guide explains how to minimise acoustic intrusion while preserving the performance of the equipment. One will learn about sound‑absorbing materials, mass‑loaded barriers, and practical installation techniques that do not require professional contractors. By following the steps, a brewer can create a quieter brewing environment, improve personal comfort, and maintain good relations with building management.
What You’ll Need
- Butyl Sound Deadening Mat – 80 mil, 36 sq ft, waterproof, high‑tack adhesive.
- Mass Loaded Vinyl – 1 lb per sq ft, 27 STC rating, non‑toxic.
- Amazon Basics Car Sound Deadening Mat – 10‑piece kit, self‑adhesive, flexible.
- US Cargo Control Sound Dampening Blanket – 96" × 80", machine‑washable, grommeted.
- Measuring tape, utility knife, cleaning solvent, roller or flat tool for pressing, safety gloves, and basic hand tools.
Step 1 – Identify and Isolate the Primary Noise Sources
The first task is to locate the components that generate the most acoustic energy. Fermentation vessels produce low‑frequency rumbles, while cooling coils and air‑flow fans emit higher‑frequency whine. One should place a smartphone recorder near each element and note the decibel peaks. This diagnostic step informs where mass‑loading or absorption will be most effective. For example, a stainless‑steel fermenter often vibrates against a metal shelf; adding a dense barrier behind the shelf can dramatically reduce transmission.
When the noisy surfaces are identified, one can plan the placement of the Butyl Sound Deadening Mat. Its three‑layer construction—8‑wire aluminium foil, butyl rubber core, and strong adhesive—provides both vibration dampening and heat insulation, which is valuable for equipment that generates warmth during fermentation.
Step 2 – Apply Butyl Sound Deadening Mat to Shelving and Enclosures
Begin by cleaning the target surface with isopropyl alcohol to remove dust and oils. Cut the mat to size using a utility knife; the 36 sq ft roll can be divided into smaller panels that fit under each fermenter. Peel the backing and press the adhesive side firmly onto the shelf or enclosure, using a roller to eliminate air pockets. The high‑tack adhesive ensures a permanent bond, and the 80 mil thickness adds sufficient mass to block low‑frequency vibrations.
Key product details: price $40.37, rating 4.6 / 5 from 391 reviews. Users report that the mat reduces engine‑like rumble by up to 90 percent when applied correctly. Compared with thinner alternatives, the 80 mil thickness offers a superior weight‑to‑flex ratio, which translates into better acoustic isolation without adding excessive bulk.
Step 3 – Install Mass Loaded Vinyl (MLV) on Walls and Floor Panels
Mass Loaded Vinyl is a dense, flexible sheet that adds acoustic mass, thereby lowering sound transmission through structures. Unroll the 4’ × 25’ sheet and measure the area surrounding the brewing station. Cut the MLV to fit the back wall of the closet or the floor beneath a stand‑alone fermenter. Secure the edges with construction adhesive or double‑sided tape, ensuring a tight seal to prevent air gaps.
The product offers a proven 27 STC rating, which means it can attenuate speech and low‑frequency noise effectively. Priced at $259.90 with a rating of 4.3 / 5 from 340 reviews, the MLV is more expensive than basic foam but provides a permanent, non‑toxic solution that does not off‑gas. Its 1 lb per sq ft density adds the necessary inertia to stop sound waves from passing through thin drywall typical of many apartments.
Step 4 – Use Flexible Car‑Style Mats for Small Gaps and Curved Surfaces
Some equipment features irregular shapes, such as the curved base of a fermentation temperature controller. The Amazon Basics Car Sound Deadening Mat is thin enough to conform to these contours while still providing a reflective aluminium foil layer for thermal management. Cut the 14.5×10×in pieces to wrap around the base, then press the self‑adhesive backing onto the surface.
This kit costs $14.69 and holds a 4.7 / 5 rating from 5,521 reviews, indicating high customer satisfaction. Its pliable nature makes it ideal for sealing seams between the fermenter and its mounting platform, preventing vibration from travelling into the floor.
Step 5 – Hang a Sound‑Absorbing Blanket to Treat Reverberant Room Modes
Even after mass‑loading, reflected sound can bounce off bare walls, creating echo that amplifies perceived noise. The US Cargo Control Sound Dampening Blanket provides broadband absorption, reducing reverberation without fully sound‑proofing the space. Attach the blanket to the wall opposite the brewing area using the built‑in grommets and a simple hook or tension rod.
The blanket measures 96×80 inches, weighs 12 lb, and features a NRC rating of 0.35, indicating moderate absorption across mid‑range frequencies. Priced at $76.48 with a 4.4 / 5 rating from 1,101 reviews, it is machine‑washable, allowing easy maintenance in a kitchen environment. By covering a large portion of the wall, the blanket reduces echo, making the overall sound level feel lower.
Tips & Pro Tips
- Seal all edges of MLV and butyl mats with acoustical caulk to prevent flanking paths.
- Use a rubber mallet when pressing mats onto uneven surfaces to achieve full contact without damaging the adhesive.
- Consider adding a small vibration isolation pad under the fermenter legs for additional decoupling.
- Maintain a consistent temperature inside the brewing area; excessive heat can soften adhesives and reduce effectiveness.
- When installing the blanket, avoid direct sunlight on the fabric to prevent fading and loss of acoustic performance.
Conclusion
By systematically identifying noise sources, applying dense butyl mats, installing mass‑loaded vinyl, using flexible car‑style mats for tight spaces, and hanging a broadband absorbing blanket, a homebrewer can achieve a substantial reduction in fermentation equipment noise. The recommended products deliver professional‑grade performance at a fraction of the cost of custom acoustic treatments. One should now feel confident in creating a quieter brewing sanctuary that respects both personal comfort and apartment living standards.
Products Mentioned in This Guide
Frequently Asked Questions
What sound‑deadening materials work best for fermenters in an apartment?
Butyl sound‑deadening mats and mass‑loaded vinyl (MLV) are effective because they add mass and absorb vibrations without harming equipment performance.
How can I install soundproofing without drilling into walls?
Use high‑tack adhesive mats and attach MLV to the inside of cabinets or under the fermenter platform, securing them with removable mounting strips.
Will covering my fermenter affect temperature control?
A thin layer of acoustic foam or MLV can reduce noise while still allowing heat exchange; just ensure ventilation gaps remain open.
Can I reduce pump noise with DIY solutions?
Wrap the pump housing in butyl mat and place it on a rubber‑isolated pad to dampen vibrations and lower audible hum.
Do I need professional help to achieve a quiet brewing setup?
No, most homebrewers can apply these sound‑absorbing products themselves using simple tools and adhesive backing.