How to Make Refrigerator Pickles Using a Pickling Kit: Easy Step‑by‑Step Guide for Crispy, Quick Pickles
Introduction
One will learn how to transform fresh vegetables into tangy, crunchy refrigerator pickles using a structured kit‑based approach. The process combines food‑safe equipment, balanced brine, and controlled fermentation to produce consistent quality. Understanding each stage reduces the risk of spoilage and maximizes flavor development. This guide provides actionable instructions, professional product recommendations, and troubleshooting advice for reliable results.
What You’ll Need
- Fresh cucumbers or other crisp vegetables
- Clean wide‑mouth mason jars
- Food‑grade fermentation lids and weights
- Seasoning blend or pickling spice
- Vinegar, water, and salt for brine
- Optional: a dedicated fermentation kit for convenience
Step 1: Prepare the Vegetables
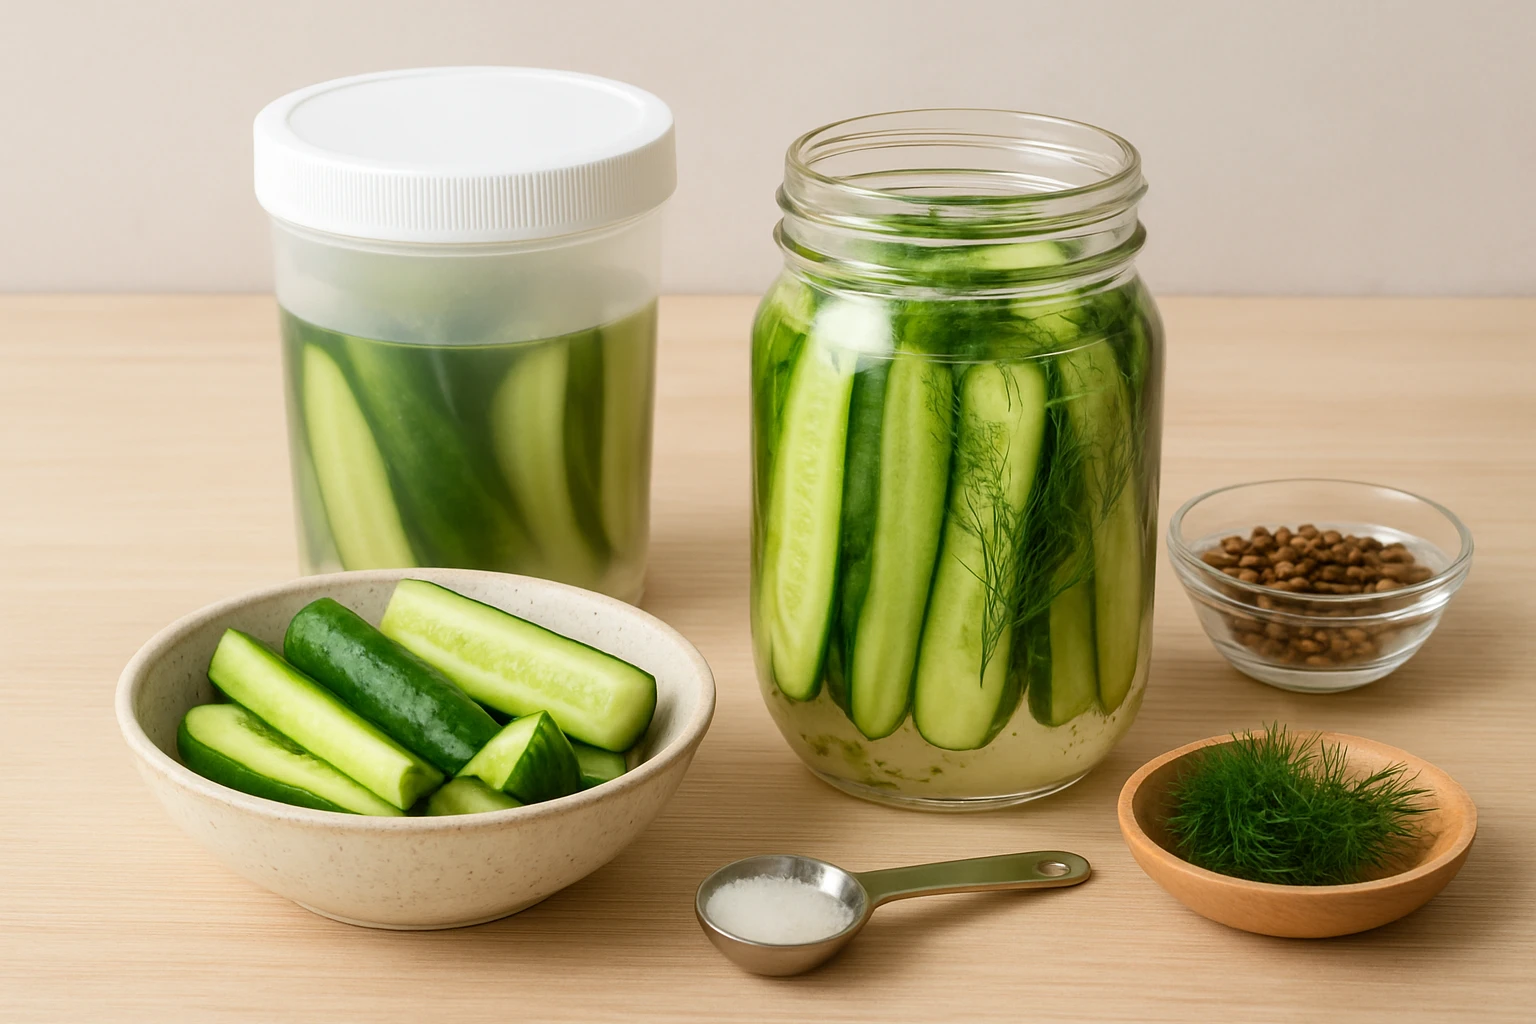
Begin by selecting firm, unblemished cucumbers that are no larger than six inches in length. Wash the vegetables under cold running water and trim the ends to remove any bruised tissue. Slice the cucumbers into spears or rounds, depending on personal preference, and set them aside in a clean bowl.
For optimal submersion, one may use the Aieve Fermentation Kit. The kit includes four professional fermentation lids with one‑way exhaust valves, four heavy glass weights, and a wooden sauerkraut pounder. The lids prevent excess oxygen while allowing carbon dioxide to escape, which reduces the need for constant burping. Each weight, weighing 0.41 lb, ensures vegetables remain fully submerged, preventing surface mold. The kit is priced at $22.49 and holds a rating of 4.3 out of 5 based on 56 reviews.
Place the sliced cucumbers on a clean cutting board and lightly toss them with a pinch of salt. The salt draws moisture to the surface, creating a crisp texture and beginning the flavor infusion process. Allow the salted vegetables to rest for fifteen minutes before proceeding.
Step 2: Create a Balanced Brine
Combine one cup of distilled water, one cup of white vinegar, and thirty grams of non‑iodized salt in a saucepan. Heat the mixture over medium heat, stirring until the salt fully dissolves. Remove the brine from heat and allow it to cool to room temperature; hot brine can soften the vegetables and diminish crunch.
The flavor profile can be enhanced with Fresh Finest Bulk Pickling Spice. This four‑pound bulk blend provides a complex mixture of mustard seed, coriander, dill, and peppercorns, delivering intense aroma without additives. Priced at $33.99 with a rating of 4.7 out of 5 from 67 reviews, the spice mix is ideal for large‑batch pickling or for those who desire consistent seasoning across multiple jars.
Measure one tablespoon of the bulk spice for every quart of brine, adjusting to taste. Stir the spice into the cooled brine, then taste a small sip; the solution should be tangy yet balanced, with a slight salty edge.
Step 3: Pack the Jars
Arrange the prepared cucumber slices tightly inside a clean wide‑mouth mason jar, leaving approximately one inch of headspace at the top. Insert a few fresh garlic cloves, peppercorns, or dill sprigs if additional aromatics are desired.
For a complete container solution, consider the IceFun Mason Jar Fermentation Kit. The kit supplies four 32‑oz mason jars with plastic fermentation lids, dual‑channel airlocks, and lead‑free glass weights. The wide 3.4‑inch opening simplifies filling and cleaning, while the airlock maintains a low‑oxygen environment. Priced at $37.99 and rated 4.2 out of 5 based on 42 reviews, the kit eliminates the need to purchase lids and weights separately.
After the vegetables are packed, pour the cooled brine over them until the liquid covers the produce by at least half an inch. Use the included wooden pounder from the Aieve Kit to gently press the cucumbers deeper, ensuring complete submersion.
Place a glass weight from the Aieve Kit on top of the vegetables, then seal the jar with the fermentation lid from the IceFun Kit. The one‑way valve will release excess gas while preventing oxygen ingress.
Step 4: Ferment in the Refrigerator
Transfer the sealed jar to the refrigerator immediately. The cool temperature slows bacterial activity, producing a quick pickle that retains crispness. Allow the vegetables to ferment for three to five days, checking daily for desired tanginess.
If additional flavor depth is desired, one may incorporate a packet from the Pearl and Johnny Pickle Kit Refill. Each refill contains four packets of organic seasoning mix that complement the brine with classic dill and garlic notes. Priced at $8.29 and rated 4.6 out of 5 from 405 reviews, the refill offers a convenient way to vary flavor without measuring bulk spices.
During the fermentation period, observe the airlock for bubbling activity, which indicates active fermentation. If the liquid level drops, add a small amount of brine to maintain full coverage.
Step 5: Store and Serve
When the pickles reach the preferred level of acidity, remove the fermentation lid and replace it with a standard mason‑jar screw lid. Store the jars in the refrigerator for up to two months; the cold environment preserves texture and flavor.
Serve the pickles as a side dish, garnish for sandwiches, or as a crunchy addition to salads. The crisp texture achieved through proper weight placement and controlled fermentation will remain consistent throughout the storage period.
Tips & Pro Tips
- Always use non‑iodized salt; iodine can inhibit the beneficial bacteria needed for fermentation.
- Maintain a headspace of at least one inch to accommodate gas expansion without overflow.
- For extra crunch, add a few grape leaves or a pinch of calcium chloride to the jar.
- Label each jar with the start date using the tags provided in the IceFun Kit; this practice simplifies inventory management.
- If cloudiness appears in the brine, it is a natural by‑product of fermentation and does not indicate spoilage.
Troubleshooting
| Problem | Possible Cause | Solution |
|---|---|---|
| Mold on surface | Insufficient submersion | Re‑press vegetables with the glass weight and ensure the lid seal is airtight. |
| Pickles are too soft | Over‑fermentation or warm storage | Reduce fermentation time and keep the jar in the refrigerator immediately after sealing. |
| Brine is overly salty | Excess salt in recipe | Rinse vegetables briefly and adjust future brine to 1‑2 % salt by weight. |
Conclusion
One now possesses a reliable method for producing crisp refrigerator pickles using a structured kit, balanced brine, and disciplined fermentation. By following each step, the risk of spoilage is minimized, and the flavor profile can be customized with premium spices or refill mixes. Consistent results encourage experimentation with different vegetables and seasoning blends, expanding one’s culinary repertoire.
Products Mentioned in This Guide
Frequently Asked Questions
What types of vegetables can I use for refrigerator pickles?
Any firm, crisp vegetables such as cucumbers, carrots, radishes, or green beans work well, as long as they are washed and trimmed.
Do I need special fermentation lids and weights for refrigerator pickles?
Yes, food‑grade fermentation lids and weights keep the vegetables submerged and prevent mold during brining.
How long does it take for refrigerator pickles to develop flavor?
Typically 3–5 days in the fridge yields a tangy crunch, but you can taste and adjust up to 2 weeks for stronger flavor.
Can a pickling kit replace measuring individual ingredients?
A complete pickling kit provides pre‑measured spices, brine mix, and lids, simplifying the process while ensuring proper ratios.
What steps prevent spoilage in refrigerator pickles?
Use clean jars, keep vegetables fully covered by brine, store at a consistent cool temperature, and discard any pickles that show off‑flavors or mold.