Introduction
High‑quality product photos are essential for converting browsers into buyers, especially for niche items such as fermented foods. This guide will teach the reader how to photograph kimchi, sauerkraut, kombucha, and other fermented products with a professional appearance. The reader will learn how to set up a compact studio, choose appropriate lighting, style the food for visual appeal, and edit the images for maximum impact. By following these steps, one can produce images that highlight texture, color, and freshness, thereby increasing sales and brand credibility.
What You’ll Need
- Camera with manual controls (DSLR or mirrorless)
- Tripod for stability
- Continuous or strobe lighting kit
- Reflectors or white boards to bounce light
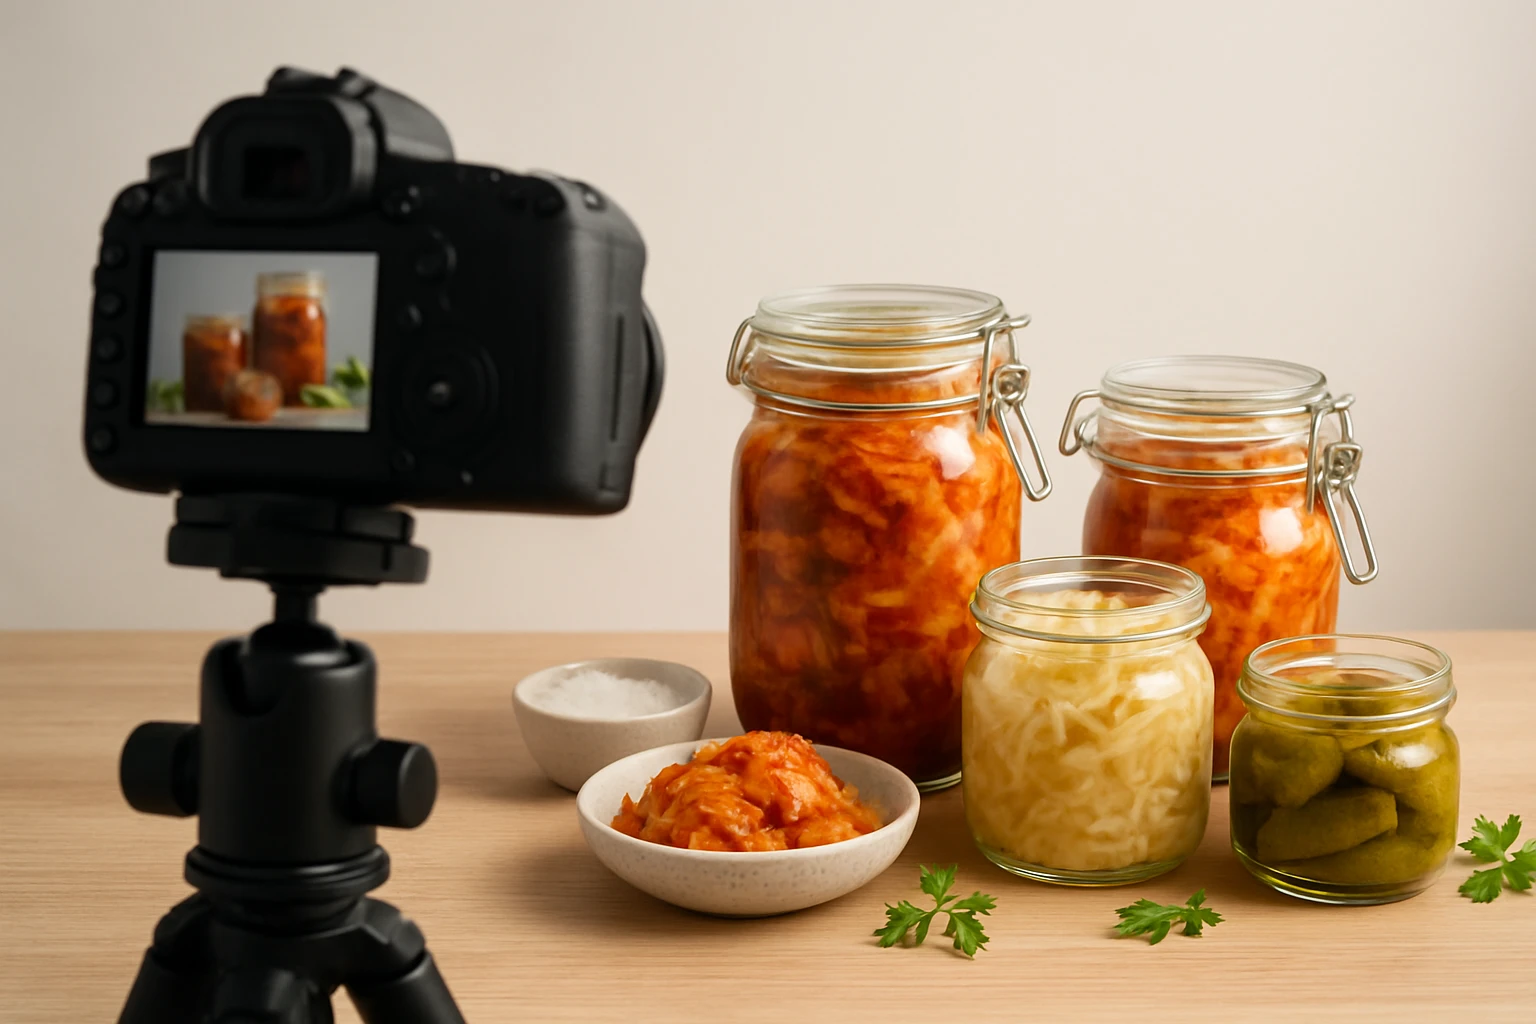
- Small tabletop backdrop – BYSTONE Photography Backdrops Kit
- Cleaning cloths and lint rollers
- Basic editing software (Adobe Lightroom, Capture One, or free alternatives)
Step 1: Set Up Your Shooting Space
Begin by selecting a quiet area with minimal natural light, such as a spare room or a large closet. Clear the surface of any clutter and place a sturdy table that can support the weight of jars and containers. Position a tripod at the center of the table to keep the camera level and to allow consistent framing across multiple shots. Ensure that the space has access to power outlets for lighting equipment, and that the background walls are neutral to avoid color contamination.
After the physical space is prepared, test the camera’s focus by pointing it at a piece of white paper placed on the table. Use live view to verify that the focus points align with the intended product area. Adjust the tripod height so that the camera lens is approximately 30‑45 centimeters above the tabletop, which provides a natural perspective for flat‑lay compositions.
Step 2: Prepare the Backdrop
The backdrop serves as the visual foundation for every photograph, and a clean, versatile surface is critical for showcasing fermented foods. The BYSTONE Photography Backdrops Kit offers a foldable board and ten double‑sided paper backdrops, delivering twenty distinct styles in a compact package. Each backdrop measures 16.5 × 11.7 inches, making it ideal for small jars, bowls, and plates commonly used for fermented products.
Unfold the board on the table and secure the desired backdrop using the included clips and L‑brackets. For fermented foods, a matte white or light gray side often provides the best contrast, while a textured wood or marble pattern can add a rustic feel that matches the artisanal nature of the product. The kit’s shadow props simulate window‑style lighting, allowing subtle depth to be introduced without additional accessories.
Because the paper surface can be gently wiped, any accidental spills from sauces or brine can be cleaned without damaging the backdrop. Store the board and backdrops in the provided carrying bag when not in use to protect them from dust and creases.
Step 3: Light the Scene
Lighting is the most influential factor in rendering the complex colors of fermented foods accurately. Continuous LED panels are recommended because they provide a steady output that matches the camera’s exposure settings, eliminating the need for flash synchronization. Position two lights at 45‑degree angles on either side of the product, each approximately 50 cm from the tabletop, to create soft, even illumination.
To avoid harsh reflections on glossy jars, use a diffuser such as a white sheet or a softbox on each light source. The shadow props from the BYSTONE kit can be placed behind the product to generate a gentle gradient that mimics natural window light, enhancing the perception of depth. A white reflector placed opposite the main light will bounce additional fill light into the shadows, preserving detail in the fermented texture.
Measure the light intensity with a handheld meter or use the camera’s histogram to ensure that the brightest highlights do not clip. Aim for a balanced exposure where the brine’s translucency remains visible and the vibrant hues of cabbage, carrots, or berries are faithfully reproduced.
Step 4: Style the Fermented Food
Styling transforms a simple product into an inviting visual story. Begin by selecting containers that reflect the brand’s aesthetic—clear glass jars for a modern look or rustic ceramic crocks for a heritage feel. Arrange the fermented items so that the most colorful elements are positioned toward the foreground, drawing the viewer’s eye.
Incorporate complementary props such as wooden spoons, linen napkins, or fresh herbs to suggest usage contexts. Keep prop selection minimal; excessive accessories can distract from the primary product. Use the light shadow props to simulate a window ledge, placing a small potted herb or a slice of bread beside the jar to convey a ready‑to‑serve scenario.
Before shooting, wipe the jars with a lint‑free cloth to remove fingerprints and moisture. If the brine creates unwanted glare, lightly spray a fine mist of water on the backdrop to diffuse reflections, but ensure the product itself remains dry.
Step 5: Capture the Images
Set the camera to manual mode to maintain consistent exposure across all shots. Choose an aperture of f/8 to f/11, which provides sufficient depth of field to keep the entire jar in focus while preserving a pleasing background blur. Use a low ISO (100‑200) to minimize noise, especially when the final images will be displayed at large dimensions on eCommerce platforms.
Compose the shot using the rule of thirds, placing the jar’s center slightly off‑center to create visual interest. Shoot in RAW format to retain maximum detail for post‑processing. Take multiple exposures—one with the main light, one with added fill, and one with a slight backlight—to give flexibility during editing.
After each capture, review the image on the camera’s LCD screen, zooming in to verify that the texture of the fermented vegetables is sharp and that no unwanted shadows obscure the product. Adjust the lighting or reposition the props as needed before proceeding to the next angle.
Step 6: Post‑Process the Images
Import the RAW files into editing software and begin with basic adjustments: white balance, exposure, and contrast. Fermented foods often have a warm color cast; correcting the white balance ensures that the reds and oranges appear true to life. Increase the contrast slightly to emphasize the crisp edges of cabbage leaves and the glossy surface of the brine.
Apply local adjustments using brushes or gradient filters to brighten the interior of the jar without overexposing the outer edges. Use the cloning tool sparingly to remove any stray specks of dust that may have settled during the shoot. Finally, sharpen the image at a modest radius to enhance texture while avoiding halo artifacts.
Export the final images in JPEG format with a resolution of 1500 × 1500 pixels, which satisfies most eCommerce platform requirements while preserving visual quality. Include multiple angles—front, top‑down, and a close‑up—to give customers a comprehensive view of the product.
Tips & Pro Tips
- Use a neutral gray card to set a custom white balance for each session; this eliminates color shifts caused by different lighting conditions.
- When photographing bubbly kombucha, tilt the bottle slightly and use a fast shutter speed (1/200 s or higher) to freeze the effervescence.
- To emphasize the natural texture of sauerkraut, place a small spoon partially submerged in the brine and focus on the spoon’s tip.
- Consider shooting in a slightly cooler color temperature (around 5600 K) to counteract the warm tones of fermentation, then adjust in post‑processing.
- Keep a consistent naming convention for files, such as productname_angle_date.jpg, to streamline uploading to the store.
Conclusion
This guide has presented a systematic approach to photographing fermented foods for eCommerce, covering studio setup, backdrop selection, lighting techniques, styling strategies, camera settings, and post‑processing workflows. By applying these methods, one can produce images that convey freshness, authenticity, and culinary appeal, thereby increasing customer confidence and conversion rates. The reader is encouraged to experiment with different backdrops and lighting angles, remembering that consistency across a product line reinforces brand identity.
Products Mentioned in This Guide
Frequently Asked Questions
What type of lighting works best for photographing fermented foods?
Use soft, diffused continuous or strobe lighting with a reflector or white board to bounce light and highlight texture without harsh shadows.
Which backdrop is recommended for a clean, professional look?
A small tabletop backdrop like the BYSTONE Photography Backdrops Kit provides a neutral surface that keeps focus on the product.
How can I prevent glare on glossy fermented foods like kimchi?
Position the light source at a 45-degree angle and use a polarizing filter or a diffuser to reduce reflections.
What basic editing adjustments should I make to enhance fermented food photos?
Increase contrast slightly, boost saturation to emphasize natural colors, and sharpen details to showcase texture.
Do I really need a tripod for food photography?
Yes, a tripod ensures camera stability, consistent framing, and allows you to use lower shutter speeds for optimal exposure.