Introduction
Antique fermentation crocks possess a timeless charm, yet they often lack the modern conveniences that ensure consistent, safe fermentations. This guide will teach the reader how to evaluate an old crock, repair it, apply a food‑safe seal, install a contemporary airlock system, and add reliable weights. By the end of the article, one will be able to transform a historic piece into a functional tool that produces flavorful sauerkraut, kimchi, or craft beverages while preserving its vintage aesthetic.
The process combines careful restoration with the strategic use of modern accessories. Understanding why each step matters will prevent contamination, minimize waste, and extend the life of a cherished heirloom. The reader will also discover which readily available products simplify the retrofit without compromising authenticity.
Whether the crock has survived a family kitchen for generations or was acquired at a flea market, the techniques presented are applicable to any ceramic or stoneware vessel. The guide assumes a basic familiarity with food safety principles and a willingness to invest a modest amount of time and resources.
Proceed now to gather the necessary tools, then follow the numbered steps to achieve a modern‑ready crock that honors tradition while embracing scientific precision.
What You’ll Need
- Food‑safe ceramic sealant (e.g., food‑grade epoxy or glaze)
- Soft scrub brush and non‑abrasive sponge
- Isopropyl alcohol (70% or higher) for sanitizing
- Heat‑resistant gloves
- Rubber grommet set for airlocks
- Soligt Fermentation Jar Weights – $14.99, 4.6/5 rating (6,169 reviews)
- Humble House Fermentation Crock Kit – $44.99, 4.5/5 rating (2,038 reviews)
- Qianfenie 1‑Gallon Fermentation Jar Set – $32.99, 4.7/5 rating (972 reviews)
- Silicone grease (food‑grade) for sealing gaskets
- Measuring cup, thermometer, and a clean workspace
Step 1: Assess the Crock Condition
The first task is to examine the antique crock for cracks, glaze deterioration, or structural weaknesses. Place the crock on a flat surface and gently tap the sides; a clear ringing sound indicates intact ceramic, while a dull thud may reveal hidden fissures. Use a flashlight to inspect the interior for glaze crazing, which can harbor microbes.
If minor cracks are present, they can be repaired with a food‑safe epoxy. Larger fractures may compromise the vessel’s ability to hold brine and should be considered a sign to either retire the crock or limit its use to decorative purposes.
Document any damage with photographs. This visual record helps track repair progress and provides evidence if the crock is later sold or gifted.
Why this step matters: A compromised seal permits oxygen ingress, leading to spoilage and off‑flavors. Early detection prevents wasted ingredients and protects the fermenter’s reputation.
Step 2: Clean and Sanitize Thoroughly
Begin by removing any residual food particles with warm water and a soft scrub brush. Avoid abrasive cleaners that could strip the historic glaze. Rinse the crock several times to eliminate soap residues.
Sanitize by wiping the interior with a cloth soaked in 70% isopropyl alcohol. Allow the alcohol to air‑dry for at least five minutes. This step eliminates surface microbes without introducing harsh chemicals that could react with the glaze.
For added assurance, submerge the crock in a solution of one tablespoon of unscented liquid chlorine bleach per gallon of water for ten minutes, then rinse thoroughly. This method is especially important for crocks that have stored unknown foods in the past.
Why this step matters: Fermentation relies on beneficial bacteria thriving in an environment free of competing pathogens. Proper sanitation sets the stage for a predictable microbial community.
Step 3: Repair Cracks with Food‑Safe Sealant
Apply a thin layer of food‑grade epoxy to each crack, following the manufacturer’s instructions for mixing and curing time. Use a small brush to work the sealant deep into the fissure, ensuring no air pockets remain.
Allow the epoxy to cure for the recommended 24‑hour period in a well‑ventilated area. Once cured, sand any excess with fine‑grit sandpaper to restore a smooth surface.
If the original glaze is heavily damaged, consider applying a new food‑safe glaze over the interior. This step creates a non‑porous barrier that prevents flavor absorption, a concern highlighted in the Soligt Fermentation Jar Weights description (“lead‑free, non‑porous glass never absorbs food odors”).
Why this step matters: A repaired, non‑porous interior prevents brine from seeping into micro‑cracks, which could cause uneven fermentation and unwanted mineral leaching.
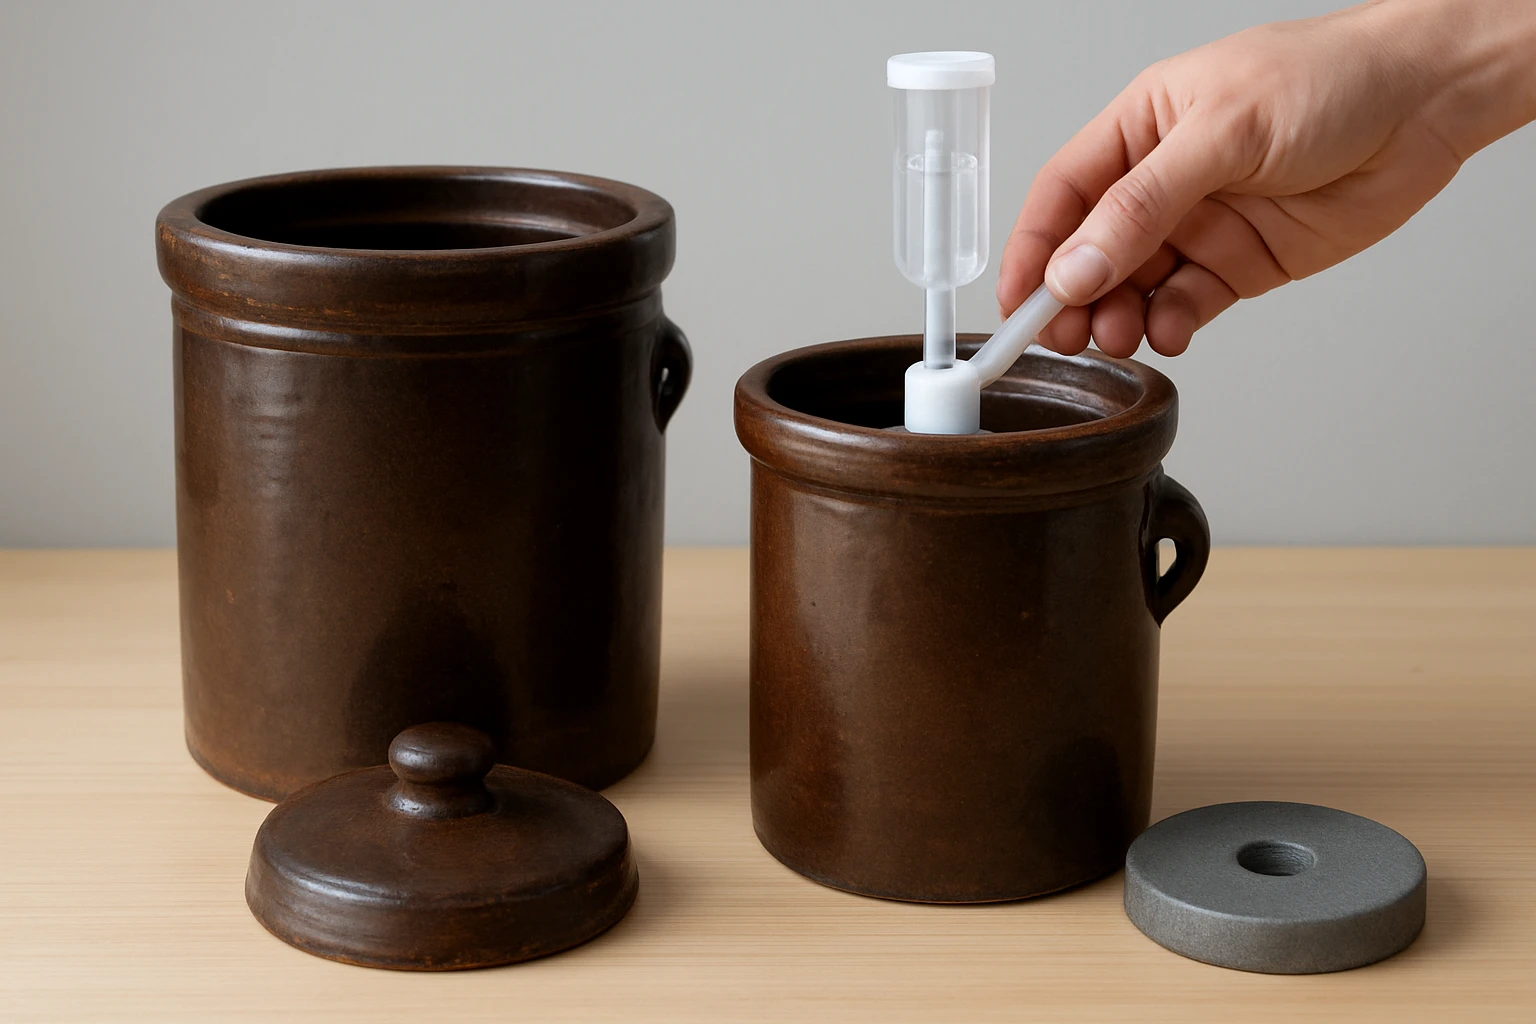
Step 4: Install a Modern Airlock System
Modern airlocks provide a one‑way valve that releases carbon dioxide while preventing oxygen entry. To retrofit an antique crock, drill a small hole (approximately 1/2 inch) near the lid’s rim, taking care not to crack the surrounding ceramic.
Insert a rubber grommet into the hole, then attach the airlock stem. Seal the junction with food‑grade silicone grease to ensure an airtight fit. The Qianfenie 1‑Gallon Fermentation Jar Set includes three airlocks and spare silicone gaskets, making it an ideal source for these components.
Test the airlock by filling the crock with a small amount of brine, sealing the lid, and observing whether bubbles escape through the valve without allowing external air to enter.
Why this step matters: An effective airlock maintains anaerobic conditions, which are essential for lactic‑acid bacteria to dominate and produce safe, tangy fermentations.
Step 5: Add Submersion Weights
Even with an airtight lid, vegetables can float, exposing them to oxygen and mold. Submersion weights keep the produce fully immersed in brine. The Soligt Fermentation Jar Weights are crafted from lead‑free glass, feature an ergonomic bulge handle, and fit standard wide‑mouth mason jars. Their heavy, stable design makes them suitable for placement inside larger crocks as well.
Place one or two weights on top of the vegetables, ensuring they rest evenly. The easy‑grip handle allows quick removal for sampling without disturbing the ferment.
Why this step matters: Submerged produce remains in a low‑oxygen environment, reducing the risk of surface mold and promoting uniform acidity throughout the batch.
Step 6: Prepare the Fermentation Brine
Calculate the salt concentration based on the vegetable weight—typically 2 % by weight for cabbage. Dissolve sea salt in filtered water, heating gently to accelerate dissolution, then cool to room temperature.
Pack the cleaned vegetables tightly into the crock, leaving a 1‑2 inch headspace. Pour the brine over the vegetables, ensuring they are completely covered. Use a clean utensil to press down any air pockets.
If the crock’s lid does not seal tightly, consider adding a silicone gasket cut to size. The Humble House Fermentation Crock Kit includes two fully glazed weights that can be placed on top of the lid to create additional pressure, mimicking the traditional water‑channel airlock.
Why this step matters: Proper salinity inhibits undesirable microbes while encouraging lactic‑acid bacteria, and a fully submerged environment ensures consistent fermentation.
Step 7: Monitor and Adjust
Store the crock at a stable temperature between 60‑70 °F (15‑21 °C). Check the airlock daily for gas release and inspect the surface for any signs of mold. If mold appears, remove it promptly with a sanitized spoon.
After 3‑5 days, taste a small sample. If the desired tanginess is not yet achieved, allow the ferment to continue, checking every 2‑3 days. Most vegetables reach optimal flavor within 1‑2 weeks.
When fermentation is complete, remove the weights, transfer the finished product to clean jars, and seal. The antique crock can be cleaned and stored for future batches.
Why this step matters: Ongoing observation prevents spoilage, ensures the final product meets taste expectations, and extends the crock’s usable life.
Tips & Pro Tips
- Warm the jars briefly before adding hot brine to prevent thermal shock; this reduces the risk of cracking.
- Use a food‑grade silicone lubricant on the airlock gasket for smoother operation, as suggested by reviewers of the Qianfenie set.
- For especially large crocks, consider using a second set of Soligt Fermentation Jar Weights to distribute pressure evenly.
- If the lid does not fit snugly, line the rim with a thin layer of food‑safe silicone sealant before placing the lid.
- Document the start date and ambient temperature; this data helps refine future batches.
Troubleshooting
| Problem | Possible Cause | Solution |
|---|---|---|
| Excessive surface mold | Insufficient submersion or leaky lid | Add additional Soligt Weights and verify airlock seal. |
| Slow acid development | Low temperature or low salt concentration | Raise storage temperature slightly and ensure 2 % salt ratio. |
| Crack propagation after cleaning | Thermal shock from sudden temperature change | Warm the crock gradually with lukewarm water before hot brine. |
| Airlock not releasing gas | Improper gasket placement | Re‑seat the rubber grommet and apply silicone grease. |
Conclusion
Retrofitting an antique fermentation crock combines respect for heritage with the reliability of modern food‑safe technology. By assessing the vessel, repairing cracks, applying a non‑porous seal, installing a contemporary airlock, and using sturdy weights, one can achieve consistent, flavorful fermentations while preserving the crock’s historic value.
The products highlighted—Soligt Fermentation Jar Weights, Humble House Fermentation Crock Kit, and Qianfenie 1‑Gallon Fermentation Jar Set—provide reliable tools that streamline each phase of the retrofit. Whether the reader chooses to purchase these items or rely on household equivalents, the principles remain the same: maintain anaerobic conditions, ensure food‑safe materials, and monitor progress diligently.
Armed with this knowledge, the reader can confidently bring a piece of culinary history into the modern kitchen, creating probiotic‑rich foods that delight the palate and honor tradition.
Products Mentioned in This Guide
Frequently Asked Questions
How can I tell if an antique fermentation crock is still usable?
Inspect for cracks, glaze loss, and odors; the crock should be intact, non‑porous, and free of mold or strong smells.
What steps are needed to repair cracks or chips in a vintage crock?
Clean the area, apply a food‑grade ceramic epoxy or stoneware filler, smooth it, and let it cure according to the manufacturer’s instructions.
Which food‑safe sealant is recommended for retrofitting old crocks?
A food‑grade silicone sealant or a mineral oil‑based glaze certified for food contact works well for creating a watertight seal.
How do I install a modern airlock system in a ceramic fermentation crock?
Drill a small, centered hole in the lid, insert a stainless‑steel airlock fitting, and seal it with food‑grade silicone to prevent leaks.
What type of weights should I use to keep fermenting vegetables submerged?
Use clean, non‑reactive weights such as food‑grade glass fermentation stones, stainless‑steel plates, or sealed ceramic weights.