Kitchen Layout for Home Fermenters: The Ultimate Guide
Introduction
Designing a kitchen that supports home fermentation requires thoughtful planning and an understanding of the unique demands of the process. This guide explains how to create a functional workspace, manage workflow, and store fermenting vessels safely. Readers will learn essential design principles, discover product recommendations, and acquire actionable tips for long‑term success. The information presented is grounded in practical experience and supported by reliable data.
Background and Context
Fermentation is a biochemical process in which microorganisms convert sugars into acids, gases, or alcohol. The most common home‑fermented foods include kimchi, sauerkraut, pickles, and kombucha. Successful fermentation depends on temperature stability, airtight containers, and minimal disturbance. Understanding these fundamentals allows one to design a kitchen that reduces risk of contamination and simplifies daily maintenance.
Designing the Fermentation Zone
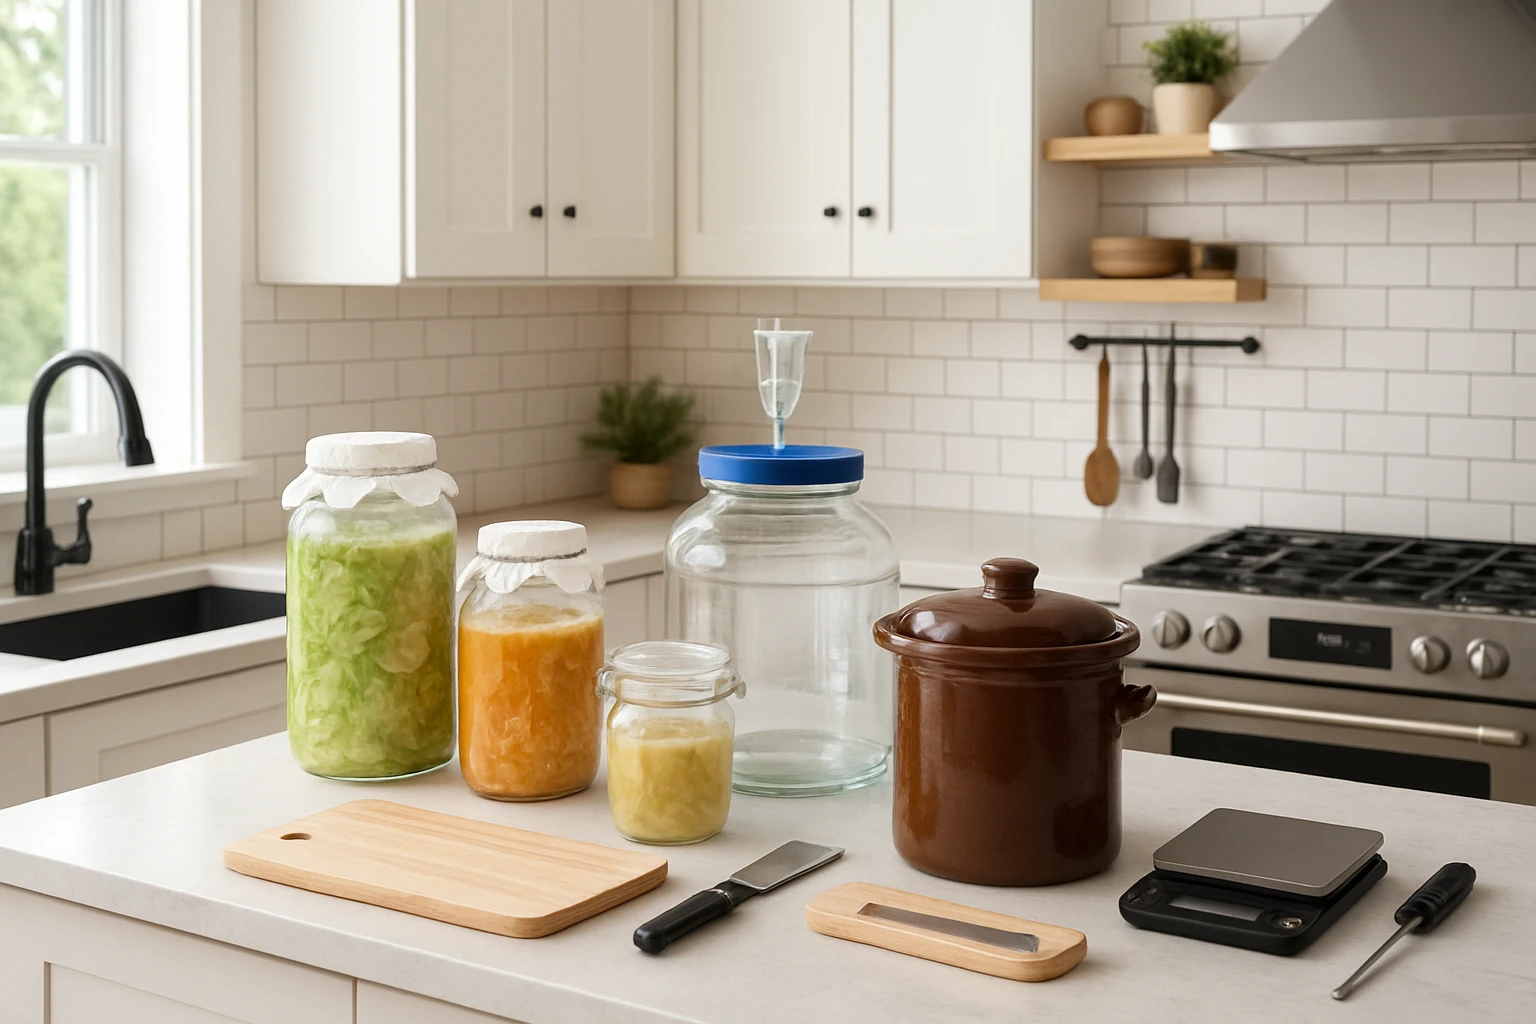
The first step is to designate a specific area of the kitchen for fermentation activities. This zone should be near a countertop that offers ample workspace and close to a sink for easy cleaning. It is advisable to select a location that maintains a consistent temperature between 60°F and 75°F, as extreme fluctuations can impair microbial activity. Adding a small insulated cabinet or a dedicated pantry shelf can further protect jars from temperature swings.
Key Elements of the Zone
- Stable surface: A sturdy countertop or table that can support the weight of multiple mason jars.
- Ventilation: A window or a low‑speed fan to prevent excess humidity buildup.
- Lighting: Soft, indirect lighting to avoid heat from direct sunlight.
- Storage solutions: Shelving units or racks that keep jars upright and accessible.
When selecting storage solutions, the Easy Fermenter Mason Jar Lids Kit proves valuable because its air‑lock lids transform standard wide‑mouth mason jars into airtight fermenters, reducing the need for separate fermentation chambers.
Workflow Optimization
An efficient workflow minimizes handling time and reduces the chance of accidental contamination. Begin by arranging the steps of a typical fermentation batch in a logical sequence: preparation, packing, sealing, and monitoring. Place cutting boards, knives, and cleaning supplies within arm's reach of the designated zone. Use labeled bins for raw vegetables, spices, and finished jars to streamline the transition between stages.
Implementing a “batch board” on the wall can help track fermentation start dates, expected finish dates, and any required burping intervals. This visual aid ensures that each jar receives appropriate attention without disrupting the overall rhythm of kitchen activities.
Storage Solutions for Fermented Products
Proper storage extends the shelf life of fermented foods and preserves their flavor profile. After the fermentation period, jars should be transferred to a cooler area, such as a refrigerator or a root cellar, where temperatures remain below 55°F. Shelving units made from stainless steel or food‑grade plastic are ideal because they resist corrosion and are easy to sanitize.
For ongoing fermentation, the airtight seal provided by the Easy Fermenter Mason Jar Lids Kit eliminates the need for frequent burping, allowing jars to remain undisturbed for weeks. The kit includes four lids, each featuring a durable plastic construction, a leak‑proof gasket, and an integrated airlock that releases carbon dioxide while preventing oxygen ingress.
Comparison and Selection Guide
Choosing the right fermentation accessories depends on batch size, jar type, and personal preference. The table below compares the Easy Fermenter Mason Jar Lids Kit with two generic alternatives that lack built-in airlocks.
| Feature | Easy Fermenter Kit | Generic Plastic Lids | Traditional Rubber Gasket Lids |
|---|---|---|---|
| Airlock Function | Integrated | None | None |
| Seal Quality | Leak‑proof gasket | Basic snap‑fit | Rubber gasket (may degrade) |
| Compatibility | Wide‑mouth mason jars | Various jar sizes | Standard mouth jars |
| Price (USD) | 22.23 | ~15.00 | ~18.00 |
| Customer Rating | 4.7/5 (343 reviews) | ~4.0/5 | ~3.8/5 |
For home fermenters who value convenience and consistency, the Easy Fermenter Kit offers the most reliable performance despite a modest price premium. Beginners may opt for generic lids initially, but upgrading to an air‑lock system will reduce maintenance effort and improve product quality.
Best Practices and Tips
- Sanitize all equipment before use to prevent unwanted microbial growth.
- Maintain a consistent temperature by locating the fermentation zone away from ovens, dishwashers, and direct sunlight.
- Label each jar with the production date, ingredient list, and target fermentation duration.
- Inspect the airlock regularly for blockages; a clear passage ensures proper gas release.
- Rotate jars periodically to distribute weight evenly on shelves and avoid strain on the lids.
- Document any deviations in taste or texture; this information assists in refining future batches.
Frequently Asked Questions
- Do I need a separate fermentation chamber? A dedicated chamber is optional; a well‑designed kitchen zone with stable temperature and proper airflow can provide sufficient conditions.
- Can I use the Easy Fermenter lids on narrow‑mouth jars? The lids are engineered for wide‑mouth mason jars; using them on narrow‑mouth containers may result in an insecure seal.
- How often should I check the airlock? Inspect the airlock once daily during the active fermentation phase to ensure it is not clogged.
- Is it safe to store fermented foods at room temperature? Short‑term storage at room temperature is acceptable for most lacto‑fermented vegetables, but refrigeration prolongs shelf life and enhances safety.
- What is the ideal batch size for a home kitchen? Batch size should correspond to available storage space; most home kitchens comfortably accommodate 4–8 jars of one‑gallon capacity.
- Can I reuse the lids after a fermentation cycle? Yes, the lids are designed for repeated use; clean them thoroughly and inspect the gasket for wear before reapplying.
- Do the lids affect the flavor of the fermented product? The lids are food‑safe plastic and do not impart any noticeable flavor when used as directed.
Conclusion
Creating a kitchen layout that supports home fermentation enhances efficiency, safety, and overall enjoyment of the craft. By designating a stable zone, optimizing workflow, and selecting reliable accessories such as the Easy Fermenter Mason Jar Lids Kit, fermenters can achieve consistent results with minimal effort. The best practices outlined in this guide empower both novices and seasoned practitioners to refine their process and produce high‑quality fermented foods for years to come.
Products Featured in This Guide
Easy Fermenter Mason Jar Lids Kit
Price: $22.23
Rating: 4.7/5.0 (343 reviews)
Why featured: Provides airtight, air‑lock sealing for wide‑mouth mason jars, simplifying the fermentation process and eliminating the need for frequent burping.
Frequently Asked Questions
What is the ideal location for a fermentation zone in a kitchen?
Place it near a countertop with easy access to a sink, away from direct sunlight and drafts, and close to a stable temperature source.
How can I maintain temperature stability for home fermentations?
Use a dedicated cabinet, a temperature‑controlled drawer, or a small fridge set to the desired range, and avoid opening the area frequently.
What type of containers are best for fermenting foods like kimchi or kombucha?
Airtight, food‑grade glass jars or ceramic crocks with water‑tight lids prevent contamination and allow proper gas release.
How should I organize fermenting vessels to prevent cross‑contamination?
Store each batch on separate shelves, label them clearly, and keep raw ingredients away from finished fermentations.
What are key workflow tips for cleaning and maintaining fermentation equipment?
Clean jars with hot, soapy water immediately after use, sanitize with a vinegar solution, and dry thoroughly before reuse.