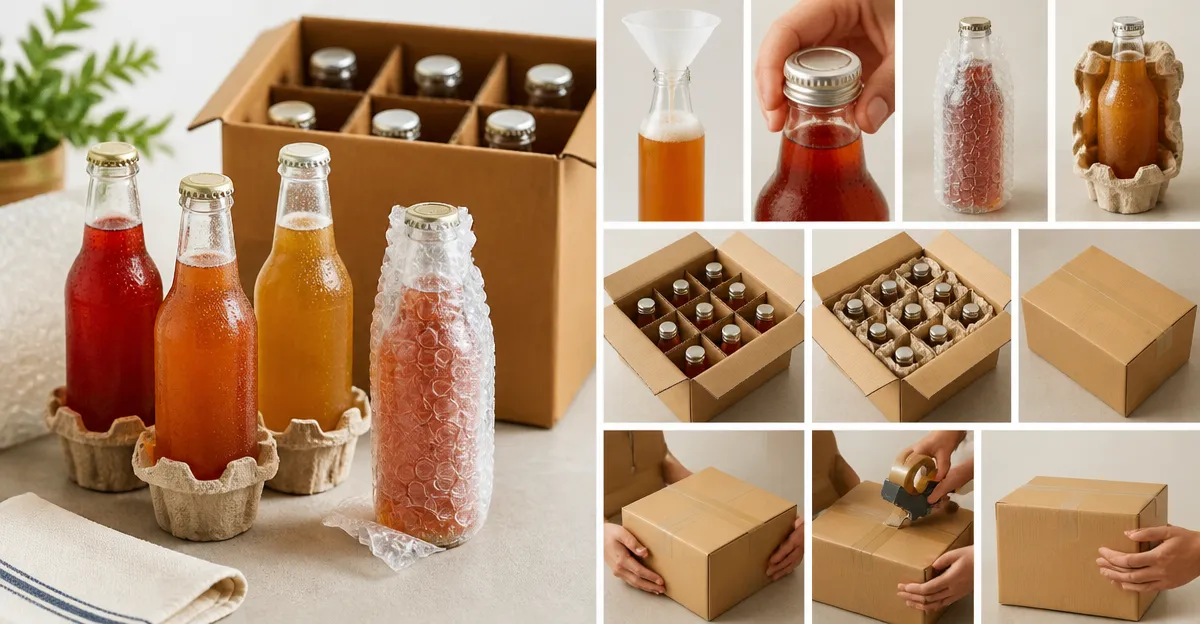
How to Safely Transport Carbonated Kombucha: 10 Expert Tips to Prevent Leaks, Bursts & Flat Fizz
Introduction
Transporting carbonated kombucha can be challenging because the live cultures generate pressure that may cause containers to leak or burst. This guide explains ten expert tips that enable one to move kombucha safely while preserving its effervescence and flavor. Readers will learn how to select appropriate containers, pack them securely, and handle them during travel. Mastering these techniques will reduce waste, protect health, and enhance the overall enjoyment of this probiotic beverage.
What You'll Need
- Sturdy, leak‑proof glass bottles such as the AOZITA 12‑Pack 2oz Clear Glass Bottles
- Small stainless‑steel funnels (included with the bottle set)
- Protective padding material (bubble wrap or foam sleeves)
- Sealable plastic bags for secondary containment
- Thermal insulated carrier if temperature control is required
Step 1: Choose a Bottle Designed for Carbonation
The first and most critical decision is the selection of a container that can withstand internal pressure. The AOZITA 2 oz glass bottles are made from thick, food‑grade glass that is both BPA‑free and lead‑free, providing a robust barrier against breakage. Their twist‑on black plastic caps incorporate a soft conical insert that creates an airtight seal, preventing carbonation from escaping. At a price of $9.49 for a twelve‑pack and a rating of 4.7 out of 5 from over nineteen thousand reviews, these bottles offer excellent value for frequent kombucha transport.
Step 2: Prepare the Bottles for Use
Before filling, clean each bottle with warm, soapy water and a small bottle brush, then rinse thoroughly. The bottles are dishwasher safe, which simplifies sanitation for larger batches. After cleaning, dry the interior with a lint‑free cloth to avoid water spots that could affect taste. Inspect the caps for any visible defects; a compromised seal will undermine the pressure‑holding capability.
Step 3: Fill Using the Included Funnels
When transferring kombucha from a fermentation jar to the 2 oz bottles, use the stainless‑steel funnels provided in the kit. The funnels reduce spillage and allow precise control over the volume, which is essential because overfilling can increase the risk of bursting. Fill each bottle to approximately 80 % of its capacity, leaving a small headspace for carbonation expansion. This practice balances the desire for a full serving with safety considerations.
Step 4: Seal the Bottles Correctly
After filling, place the twist‑on cap firmly onto the bottle mouth and turn clockwise until resistance is felt. The soft inner cone will compress, forming an airtight barrier that locks in carbon dioxide. Verify the seal by gently inverting the bottle; no liquid should escape. A proper seal ensures that the kombucha remains fizzy throughout transport.
Step 5: Label Each Bottle
Accurate labeling helps track fermentation time, flavor variations, and expiration dates. The AOZITA set includes twenty‑four labels in two styles, allowing one to differentiate between batches easily. Write the brew date, flavor, and intended consumption window on the label, then affix it to the bottle neck. Clear labeling also prevents accidental consumption of over‑carbonated bottles.
Step 6: Provide Secondary Containment
Even with a reliable seal, external forces during travel can cause minor leaks. Place each sealed bottle inside a resealable plastic bag to contain any unexpected seepage. For added protection, arrange the bagged bottles in a padded container, using bubble wrap or foam sleeves to cushion against impacts. This double‑layer approach safeguards both the kombucha and surrounding items.
Step 7: Arrange Bottles Vertically in a Rigid Box
Orientation matters because pressure is distributed more evenly when bottles stand upright. Pack the bottles vertically in a sturdy cardboard box, ensuring that they do not touch each other directly. Insert partitions or dividers if available; the AOZITA packaging uses a grid‑shaped partition that can be repurposed for this purpose. Maintaining a stable arrangement reduces the likelihood of caps loosening.
Step 8: Control Temperature During Transit
Kombucha continues to ferment at room temperature, which can increase internal pressure. If the journey exceeds two hours, consider using an insulated carrier with ice packs to keep the temperature between 4 °C and 10 °C. Cooler temperatures slow yeast activity, thereby limiting additional carbonation and preserving the desired fizz level.
Step 9: Handle the Package Gently
When loading the package into a vehicle, place it on a flat surface where it will not be jostled excessively. Avoid stacking heavy items on top of the box, as weight can compress the caps and cause leaks. Communicate to anyone assisting with the transport that the contents are pressurized, encouraging careful handling throughout the journey.
Step 10: Allow the Kombucha to Rest Before Opening
Upon arrival, let the bottles rest upright for at least fifteen minutes before uncapping. This pause allows any residual pressure to equilibrate, reducing the risk of sudden fizz eruptions. Open the caps slowly, listening for a gentle hiss that indicates a controlled release of gas. The kombucha will retain its carbonation and flavor, ready for immediate enjoyment.
Tips & Pro Tips
- Do not overfill; a headspace of 10‑15 % is optimal for carbonated beverages.
- Test one bottle before packing a full batch to confirm that the seal holds under pressure.
- Use a small piece of tape around the cap for added security during very rough transport.
- If traveling longer than 24 hours, consider adding a tiny amount of sugar to each bottle to sustain mild carbonation without excessive pressure buildup.
- Store the bottles away from direct sunlight, as heat accelerates fermentation and can cause caps to fail.
Troubleshooting
Problem: Bottle leaks during transport.
Solution: Verify that the cap was fully tightened and that the soft inner cone was properly seated. Replace any caps that appear deformed and re‑seal the bottle.
Problem: Kombucha becomes flat before consumption.
Solution: Ensure the bottle was not over‑filled, which can cause premature gas release. Also, store the bottles in a cooler environment to preserve carbonation.
Problem: Bottle bursts open.
Solution: Reduce the fermentation time before bottling, lower the temperature during storage, and never exceed the recommended headspace.
Conclusion
Transporting carbonated kombucha safely requires careful selection of containers, proper sealing, and thoughtful packing techniques. By following the ten expert tips outlined above, one can prevent leaks, avoid bottle bursts, and maintain the desired fizz throughout the journey. The AOZITA 12‑Pack 2oz Clear Glass Bottles provide an affordable, high‑quality solution that meets all the requirements of a pressurized beverage. Implement these practices to enjoy fresh, effervescent kombucha wherever travel takes one.
Products Mentioned in This Guide
Frequently Asked Questions
What type of bottle is best for transporting carbonated kombucha?
Use sturdy, leak‑proof glass bottles with swing‑top or screw caps designed to withstand pressure, such as 2‑oz clear glass bottles.
How can I prevent leaks or bursts during travel?
Seal bottles tightly, place them in sealable plastic bags, and cushion them with bubble wrap or foam sleeves.
Is temperature control important when moving kombucha?
Yes, keep kombucha cool in an insulated carrier to slow fermentation and reduce pressure buildup.
Can I use plastic containers for carbonated kombucha?
Plastic containers are not recommended because they may warp or leak under pressure; glass is safer.
What should I do if a bottle bursts during transport?
Handle the spill with a towel, discard the affected kombucha, and inspect remaining bottles for damage before continuing the trip.