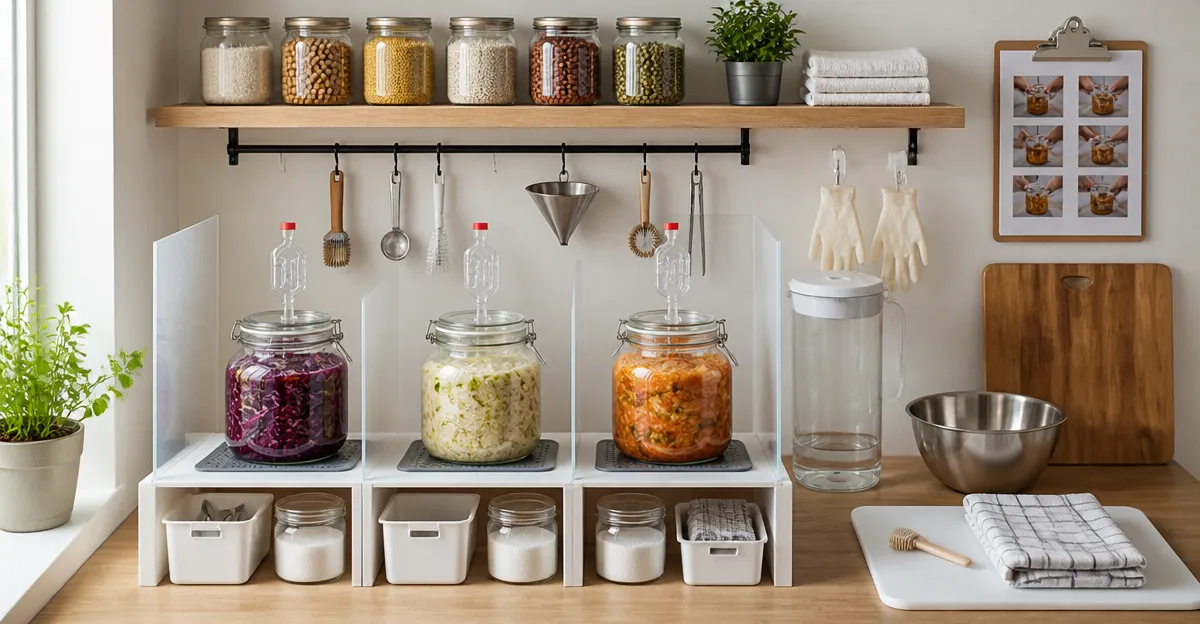
Introduction
This guide explains how one can establish a dedicated fermentation station that prevents cross‑contamination of allergens. One will learn to select appropriate containers, organize tools, and maintain a hygienic environment for probiotic foods such as sauerkraut, kimchi, and pickles. The process combines food‑safety principles with practical equipment that simplifies daily handling. By following these steps, a home cook can enjoy flavorful ferments without risking allergic reactions for family members.
What You'll Need
- Masontops Mason Jar Fermentation Kit – $53.99, 4.8/5 rating
- Vtopmart Stackable Storage Bins – $22.49, 4.7/5 rating
- Ggbin Plastic Dish Tubs – $26.54, 4.6/5 rating
- JILLMO Fermentation Jar Kit – $23.99, 4.5/5 rating
- Xileanalee Fermentation Kit – $24.99, 4.5/5 rating
Step 1: Choose a Dedicated Area
One should select a cool, dry countertop or pantry shelf that is used exclusively for fermentation activities. The area must be away from strong odors, as volatile compounds can affect the taste of fermenting vegetables. Using a dedicated space eliminates accidental contact between allergen‑free foods and items that may contain nuts, dairy, or gluten. A clear visual boundary, such as a small mat, reinforces the segregation principle.
Step 2: Install Segregated Storage
Place Vtopmart Stackable Storage Bins on the chosen surface to hold jars, lids, and tools. Each bin measures 12” L x 6” W x 3.4” H, providing ample room for wide‑mouth mason jars while keeping them visible through the clear PET construction. The removable lids protect items from dust, and the built‑in handles allow quick relocation without disturbing the fermentation process. By assigning one bin to each allergen category, one can prevent cross‑contact during storage.
Step 3: Prepare Fermentation Vessels
For small‑batch experiments, the JILLMO Fermentation Jar Kit offers two 1‑liter glass jars with airtight silicone gaskets and airlocks. The lead‑free glass is thick enough to withstand pressure, and the 3.3” wide mouth simplifies filling and cleaning. The included 7‑9 oz weights keep vegetables submerged, reducing the risk of mold formation. For larger batches, the Masontops Mason Jar Fermentation Kit converts four standard wide‑mouth mason jars into fermenters using airlock lids, pebble weights, and a wooden tamper. This kit costs $53.99 and has a 4.8/5 rating, indicating reliable performance for novice and experienced users alike.
Step 4: Organize Weights and Lids
All fermenting containers require weights to keep produce below the brine surface. The Xileanalee Fermentation Kit supplies four glass weights of approximately 7 oz each, along with silicone gaskets and grommets that create a secure seal. The glass composition is heavy yet easy to clean, ensuring that vegetables remain fully immersed. When using the Masontops kit, the included pebble weights serve the same purpose, but the Xileanalee weights provide a uniform glass feel that some users prefer for aesthetic consistency.
Step 5: Set Up a Brine Preparation Station
Use the Ggbin Plastic Dish Tubs as a temporary brine reservoir. Each tub holds 13 L, allowing one to dissolve salt in a large volume before distributing it among individual jars. The high‑density polyethylene construction resists deformation and can support up to 20 lb of contents, making it suitable for heavy vegetable loads. After brine preparation, the tubs can be repurposed for washing vegetables or cleaning used fermentation tools.
Step 6: Label and Segregate Allergen Zones
Apply waterproof labels to each storage bin, jar, and lid indicating the allergen status of the contents (e.g., "Nut‑Free", "Dairy‑Free"). Use a permanent marker or pre‑printed stickers placed on the lid rim for easy identification. Store allergen‑free jars in one bin, while jars containing potential allergens occupy a separate bin. This visual cue reduces the chance of accidental mixing during daily handling.
Step 7: Maintain Hygiene Throughout the Process
Before each fermentation cycle, wash hands thoroughly and sanitize all equipment with a mild bleach solution (one tablespoon per gallon of water). Rinse the jars, weights, and lids with clean water and allow them to air‑dry on a clean towel placed inside a dedicated bin. The clear design of the Vtopmart bins enables one to see any residual moisture, preventing mold growth. Regularly inspect the airlock vents for blockages; the Masontops airlocks vent gases without allowing oxygen, ensuring an anaerobic environment.
Tips & Pro Tips
- Rotate jars weekly to equalize temperature exposure within the refrigerator.
- Use the wooden tamper from the Masontops kit to press leafy vegetables firmly into the brine before sealing.
- For high‑acid ferments such as kimchi, reduce salt concentration to 1.5% to accelerate lactic‑acid development.
- Store the Ggbin tubs upside down after cleaning to drain excess water and speed drying.
- When preparing multiple allergen‑free batches, keep a dedicated set of weights and lids for each category to avoid cross‑contamination.
Troubleshooting
- Problem: Surface mold appears on the ferment.
Solution: Ensure the vegetables remain fully submerged; add additional weight from the Xileanalee kit or a clean stone. - Problem: Airlock does not release gas.
Solution: Check that the airlock is filled with water to the recommended level; replace a damaged seal with the spare silicone grommet from the Xileanalee kit. - Problem: Off‑flavors develop.
Solution: Verify that the brine salinity is within 2‑3% and that the fermentation temperature stays between 60‑70°F.
Conclusion
By following these structured steps, one can create an allergen‑segregated fermentation station that safeguards vulnerable diners while producing nutrient‑dense probiotic foods. The recommended tools—such as the Masontops kit, JILLMO jars, Vtopmart storage bins, Ggbin tubs, and Xileanalee weights—streamline the workflow and reinforce hygiene standards. Implementing clear labeling, dedicated zones, and regular maintenance ensures long‑term success and confidence in every batch.
Products Mentioned in This Guide
Frequently Asked Questions
What is an allergen‑segregated fermentation station?
It is a dedicated area with separate containers and tools that prevents cross‑contamination of allergens while fermenting foods like sauerkraut, kimchi, or pickles.
Which containers are best for keeping allergens separate during fermentation?
Food‑grade mason jars, BPA‑free plastic tubs, and stackable storage bins with airtight lids are ideal for isolating allergen‑free batches.
How should I clean equipment to avoid allergen transfer?
Wash all jars, lids, and utensils in hot, soapy water, rinse thoroughly, and sanitize with a dilute bleach solution before each use.
Do I need to label each fermenting batch?
Yes, label jars with the date, contents, and any allergen information to track and prevent accidental mixing.
Can I store multiple allergen‑free ferments in the same fridge?
Store them in separate bins or shelves and keep a physical barrier, such as a tray, to maintain clear segregation.