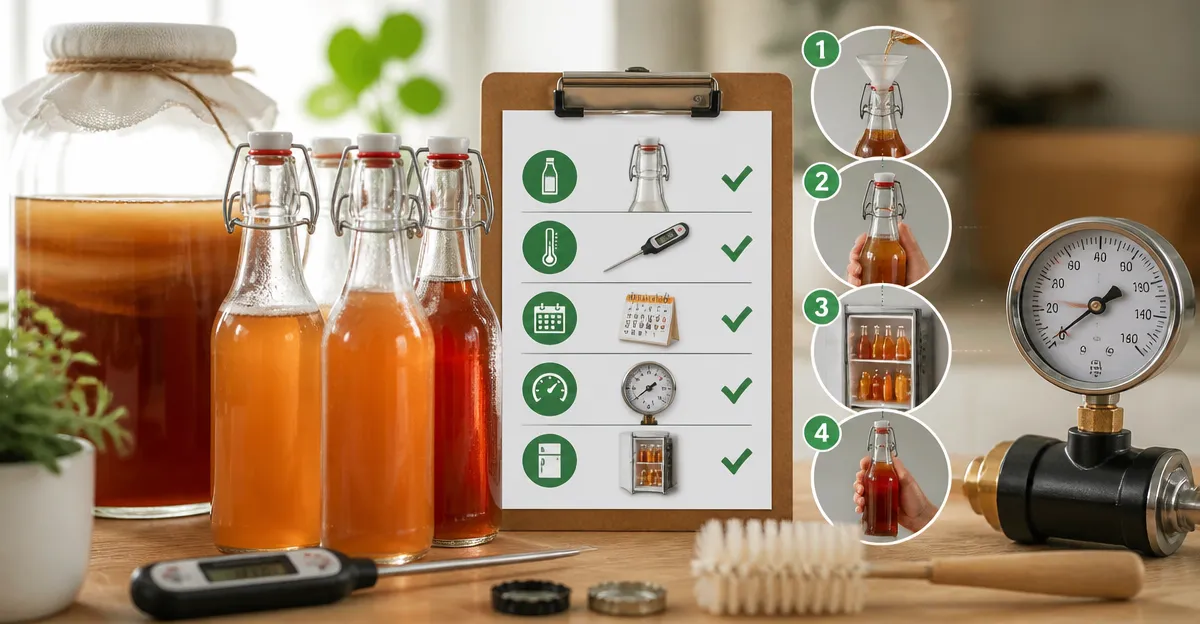
Kombucha Pressure Safety Checklist: How Home Brewers Can Prevent Bottle Explosions and Manage Fermentation Safely
Introduction
Home brewers who produce kombucha often enjoy the vibrant flavors and probiotic benefits, yet the process carries a hidden risk: excessive pressure can cause glass bottles to burst. This guide explains how to monitor carbonation, use appropriate equipment, and follow best‑practice steps that keep every batch safe. By the end of the article, readers will understand the science of pressure buildup, know which tools reduce risk, and possess a clear checklist for each fermentation stage.
While the advice applies to any home‑brew fermentation, the focus remains on kombucha because its secondary fermentation creates the most pressure. The information is practical, evidence‑based, and organized so that beginners and intermediate brewers can implement it immediately.
Safety is not an afterthought; it is integrated into each step, from bottle selection to storage. The guide also highlights affordable, high‑quality swing‑top bottles that simplify pressure control without sacrificing style.
What You'll Need
- Glass swing‑top bottles (16 oz or 1 L) with airtight caps
- Food‑grade silicone funnels for easy filling
- Water‑proof labels and a marker for tracking dates
- Bottle brush or dishwasher for thorough cleaning
- Pressure‑relief tool (optional) such as a small kitchen spoon
All of the above can be sourced from the recommended products below, each of which includes the necessary accessories.
Step 1: Choose the Right Bottles
Select bottles that are thick, lead‑free, and rated for at least 4 bar (58 psi) of pressure. The AOZITA 16 oz Swing Top Bottles provide heavy‑duty transparent glass, a stainless‑steel buckle, and silicone seals that create a leak‑proof environment. At $26.98 for an 8‑pack, they cost $3.37 per bottle and hold a 4.7‑star rating from 2,576 reviewers.
If you prefer a larger capacity for bulk batches, the AOZITA 1L Swing Top Bottles offer 33 oz volume, the same airtight design, and a price of $29.98 for eight bottles. Both sets include replacement silicone caps, waterproof labels, and food‑grade silicone funnels, eliminating the need for separate purchases.
Alternative options such as the Otis Classic 16 oz Swing Top Bottles and the AYL 16 oz Swing Top Bottles also meet pressure requirements, but the AOZITA line stands out for its bundled accessories and consistent 4.7‑star rating.
Why these bottles matter: thick glass resists thermal shock, the stainless‑steel clamp maintains a secure seal, and the silicone gasket prevents gas leakage while allowing controlled venting during “burping.”
Step 2: Sanitize All Equipment
Before any liquid contacts the bottles, sanitize them, the funnel, and the brush. Use a no‑rinse sanitizer such as Star‑San at the recommended concentration, then let the equipment air‑dry. The dishwasher‑safe nature of the AOZITA bottles means they can be placed on the top rack for a high‑temperature cycle, which kills residual yeast without damaging the silicone seals.
Cleaning tools are included with each AOZITA pack, but if you own a separate bottle brush, ensure it fits the 16 oz or 1 L opening. Proper sanitation eliminates unwanted microbes that could cause over‑fermentation and unexpected pressure spikes.
After sanitizing, re‑assemble the bottles with fresh silicone caps. The included replacement caps guarantee a fresh seal for each batch, reducing the likelihood of a worn gasket failing under pressure.
Step 3: Prepare the Primary Fermentation
Combine sweetened tea with a healthy SCOBY in a wide‑mouth glass jar. Allow the mixture to ferment at 24–27 °C (75–80 °F) for 7–14 days, depending on taste preference. During this stage, no sealed bottles are used, so pressure is not a concern.
When the primary fermentation is complete, taste the kombucha. If the flavor is mildly tart and slightly sweet, it is ready for bottling. Record the date on the provided waterproof label; this practice helps track the age of each bottle during the secondary fermentation.
At this point, the AYL 1L Swing Top Bottles become useful for larger batches, offering ample headspace for carbonation while still providing a secure seal.
Step 4: Bottle the Second Fermentation
Using the silicone funnel, pour the kombucha into each swing‑top bottle, leaving 1‑2 cm of headspace at the top. The headspace allows gases to expand without pushing the cap off. Immediately secure the swing‑top lid, ensuring the stainless‑steel buckle clicks into place and the silicone gasket sits flat.
If you add flavorings (fruit, herbs, or juice), do so now. Remember that additional sugars increase carbonation, so adjust the amount of fruit to avoid excessive pressure. The airtight seal of the AOZITA bottles will retain the carbon dioxide produced during the second fermentation.
After sealing, store the bottles at room temperature for 2–5 days. During this period, monitor pressure by gently pressing the bottle; a firm but slightly yielding feel indicates active carbonation.
Step 5: Manage Pressure – Burp Regularly
To prevent explosions, “burp” each bottle once daily. Place the bottle on a kitchen towel, gently lift the swing‑top lid just enough to release a hiss of gas, then reseal. This controlled venting reduces internal pressure while preserving most of the carbonation.
Burping is especially critical for bottles with fruit additions, as natural sugars can cause rapid CO₂ production. The silicone seal on the AOZITA and Otis bottles can be opened without tools, making daily venting quick and safe.
If a bottle feels overly hard, increase the frequency of burping or transfer the kombucha to a larger container for a brief “reset.” Never shake the bottle before burping, as agitation can cause a sudden pressure surge.
Step 6: Chill and Store Safely
Once the desired carbonation level is reached (usually after 3–4 days of burping), move the bottles to the refrigerator. Cold temperatures slow yeast activity, effectively locking in the carbonation and preventing further pressure buildup.
Store the bottles upright to keep the silicone gasket seated correctly. If you plan to keep the kombucha for more than a month, label each bottle with the bottling date and flavor using the included waterproof labels and white pen.
For long‑term storage, consider placing the bottles in a plastic tray or bucket as recommended by the AOZITA users. This extra layer of protection reduces the chance of accidental drops that could damage the swing‑top mechanism.
Tips & Pro Tips
- Temperature control: Keep the secondary fermentation environment between 20–24 °C (68–75 °F). Higher temperatures accelerate yeast activity and increase pressure.
- Measure sugar content: Use a simple refractometer to gauge residual sugar before bottling. Lower sugar means slower carbonation.
- Use a pressure‑rated bottle: All recommended bottles are rated for at least 4 bar, which is well above the typical pressure of kombucha (1–2 bar).
- Label clearly: Include flavor, bottling date, and intended “drink by” date. This practice prevents accidental over‑fermentation.
- Keep a spare funnel: Spills can introduce oxygen, leading to off‑flavors. The AOZITA kits include two food‑grade silicone funnels for exactly this reason.
- Inspect seals: Before each use, check the silicone gasket for cracks or deformation. Replace with the spare caps provided in the package if any damage is observed.
Troubleshooting
| Problem | Possible Cause | Solution |
|---|---|---|
| Bottle feels extremely hard after 2 days | Excess sugar or too warm environment | Increase burping frequency; move bottles to a cooler area; consider diluting with a small amount of water. |
| Leak at the cap | Worn silicone gasket or improper closure | Replace the gasket with one of the spare caps; ensure the stainless‑steel buckle clicks fully. |
| Off‑flavor or sourness | Contamination from unclean equipment | Sanitize all bottles and funnels again; discard the batch if contamination persists. |
| Glass cracks during burping | Thermal shock from rapid temperature change | Never burp a bottle that has just been moved from the fridge to a warm room; allow gradual temperature transition. |
Conclusion
By following this pressure safety checklist, home brewers can enjoy carbonated kombucha without fearing bottle explosions. Selecting thick, pressure‑rated swing‑top bottles, sanitizing thoroughly, controlling sugar levels, and burping daily form a reliable workflow. The recommended AOZITA, Otis, and AYL bottles provide the durability and accessories needed to streamline each step, while proper labeling and storage preserve flavor over time.
Implement the checklist on the next batch, and you will experience consistent carbonation, safe handling, and the satisfaction of sharing beautifully bottled kombucha with friends and family.
Products Mentioned in This Guide
Frequently Asked Questions
What causes bottle explosions in home‑brewed kombucha?
During secondary fermentation, yeast produces CO₂ that can build up pressure faster than the bottle can release it, especially in sealed glass containers.
Which bottle types are safest for kombucha carbonation?
Swing‑top (Grolsch) bottles with sturdy glass and a reliable rubber seal are recommended because they vent excess pressure more predictably.
How can I monitor carbonation levels to avoid over‑pressurization?
Use a pressure gauge or periodically “burp” bottles by gently opening them for a few seconds to release excess CO₂.
What temperature range helps control pressure buildup?
Ferment at 20‑25 °C (68‑77 °F); higher temperatures accelerate yeast activity and increase the risk of excess pressure.
What is a quick checklist before storing kombucha bottles?
Check bottle integrity, confirm swing‑top seals are clean, set a 2‑day secondary fermentation timer, burp daily, and store in a cool, dark place.